First Charge at Work
How to use an Evnex business charge point
Video Tutorial
1. Instant Charge (No RFID or App)
If your employer has set up a charge point without an RFID scan requirement, you can start a charging session as follows.

-
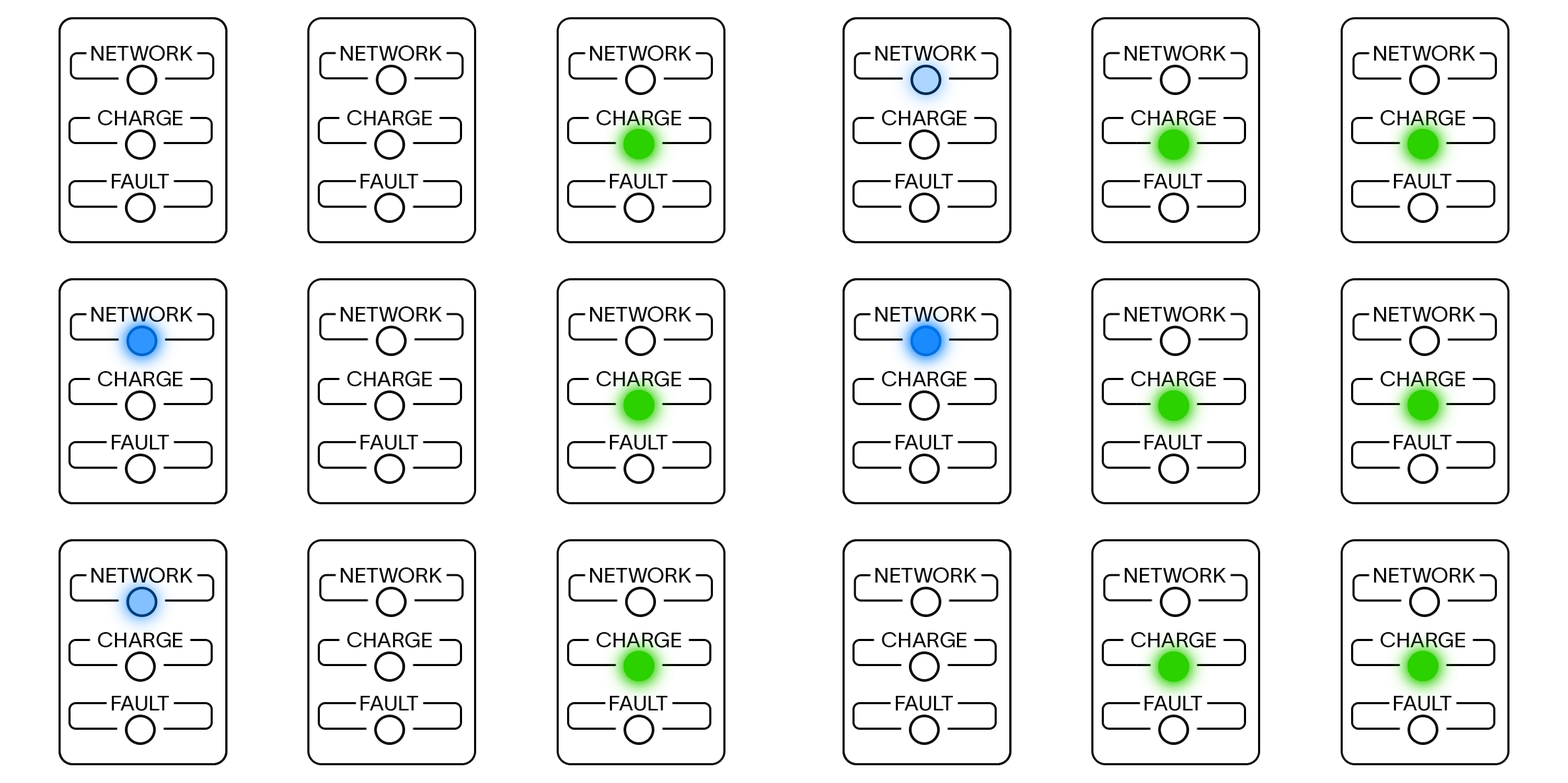
Ensure the Evnex charger is powered on You should see a blue pulsing "Network" LED indicator on the charge point when you arrive. If no LED lights are on, the charger has no power or the employer has locked the charger. In either case, contact the charge point operator directly to restore power or charging accessibility.
-
Connect your vehicle to the charge point Plug in your vehicle to the charger via the tethered cable. If the charge point is a socketed unit, connect your own cable into the charger first and plug into your vehicle second.
There are visual LED indicators on the charger that help confirm that this process has gone smoothly. If you've performed these steps the charge point's "Charge" LED light is flashing green then you're ready to start a charging session.
Does a green light mean I'm charging?Only a full continuous green LED light indicates your charging session has commenced or is in progress. A flashing green light means your charger is only ready to start a charging session. The charge point is either waiting for a pre-determined charging schedule that's been set by the charger or vehicle, or you do in fact need to scan a recognised RFID tag before the charging session can commence.

LEFT: The Evnex charger is powered on and is connected to the cloud network successfully. Centre: The charger is ready to begin a charging session (after the cable is plugged into the car). Right: The charging session has begun/is in progress.
- End a charging session Once your vehicle has finished charging, unplug the connector from the vehicle. If you need to unplug before your car is full, end the charge from your vehicle.

Remove the plug from Vehicle firstIf your charge point has a socket outlet you must remove the plug from your vehicle before removing it from the charger. If you can't remove the plug from your vehicle, please check that the vehicle is unlocked and that the charger hasn't been powered off.
2. Charge with Verification (RFID required)

-
Prepare your vehicle to charge. Follow the same steps as mentioned in part 1 by ensuring the charge point is powered on and connected to your vehicle via tethered or socketed cable. The charge point's "Charge" LED light will begin flashing green and it's ready to scan your RFID Tag.
-
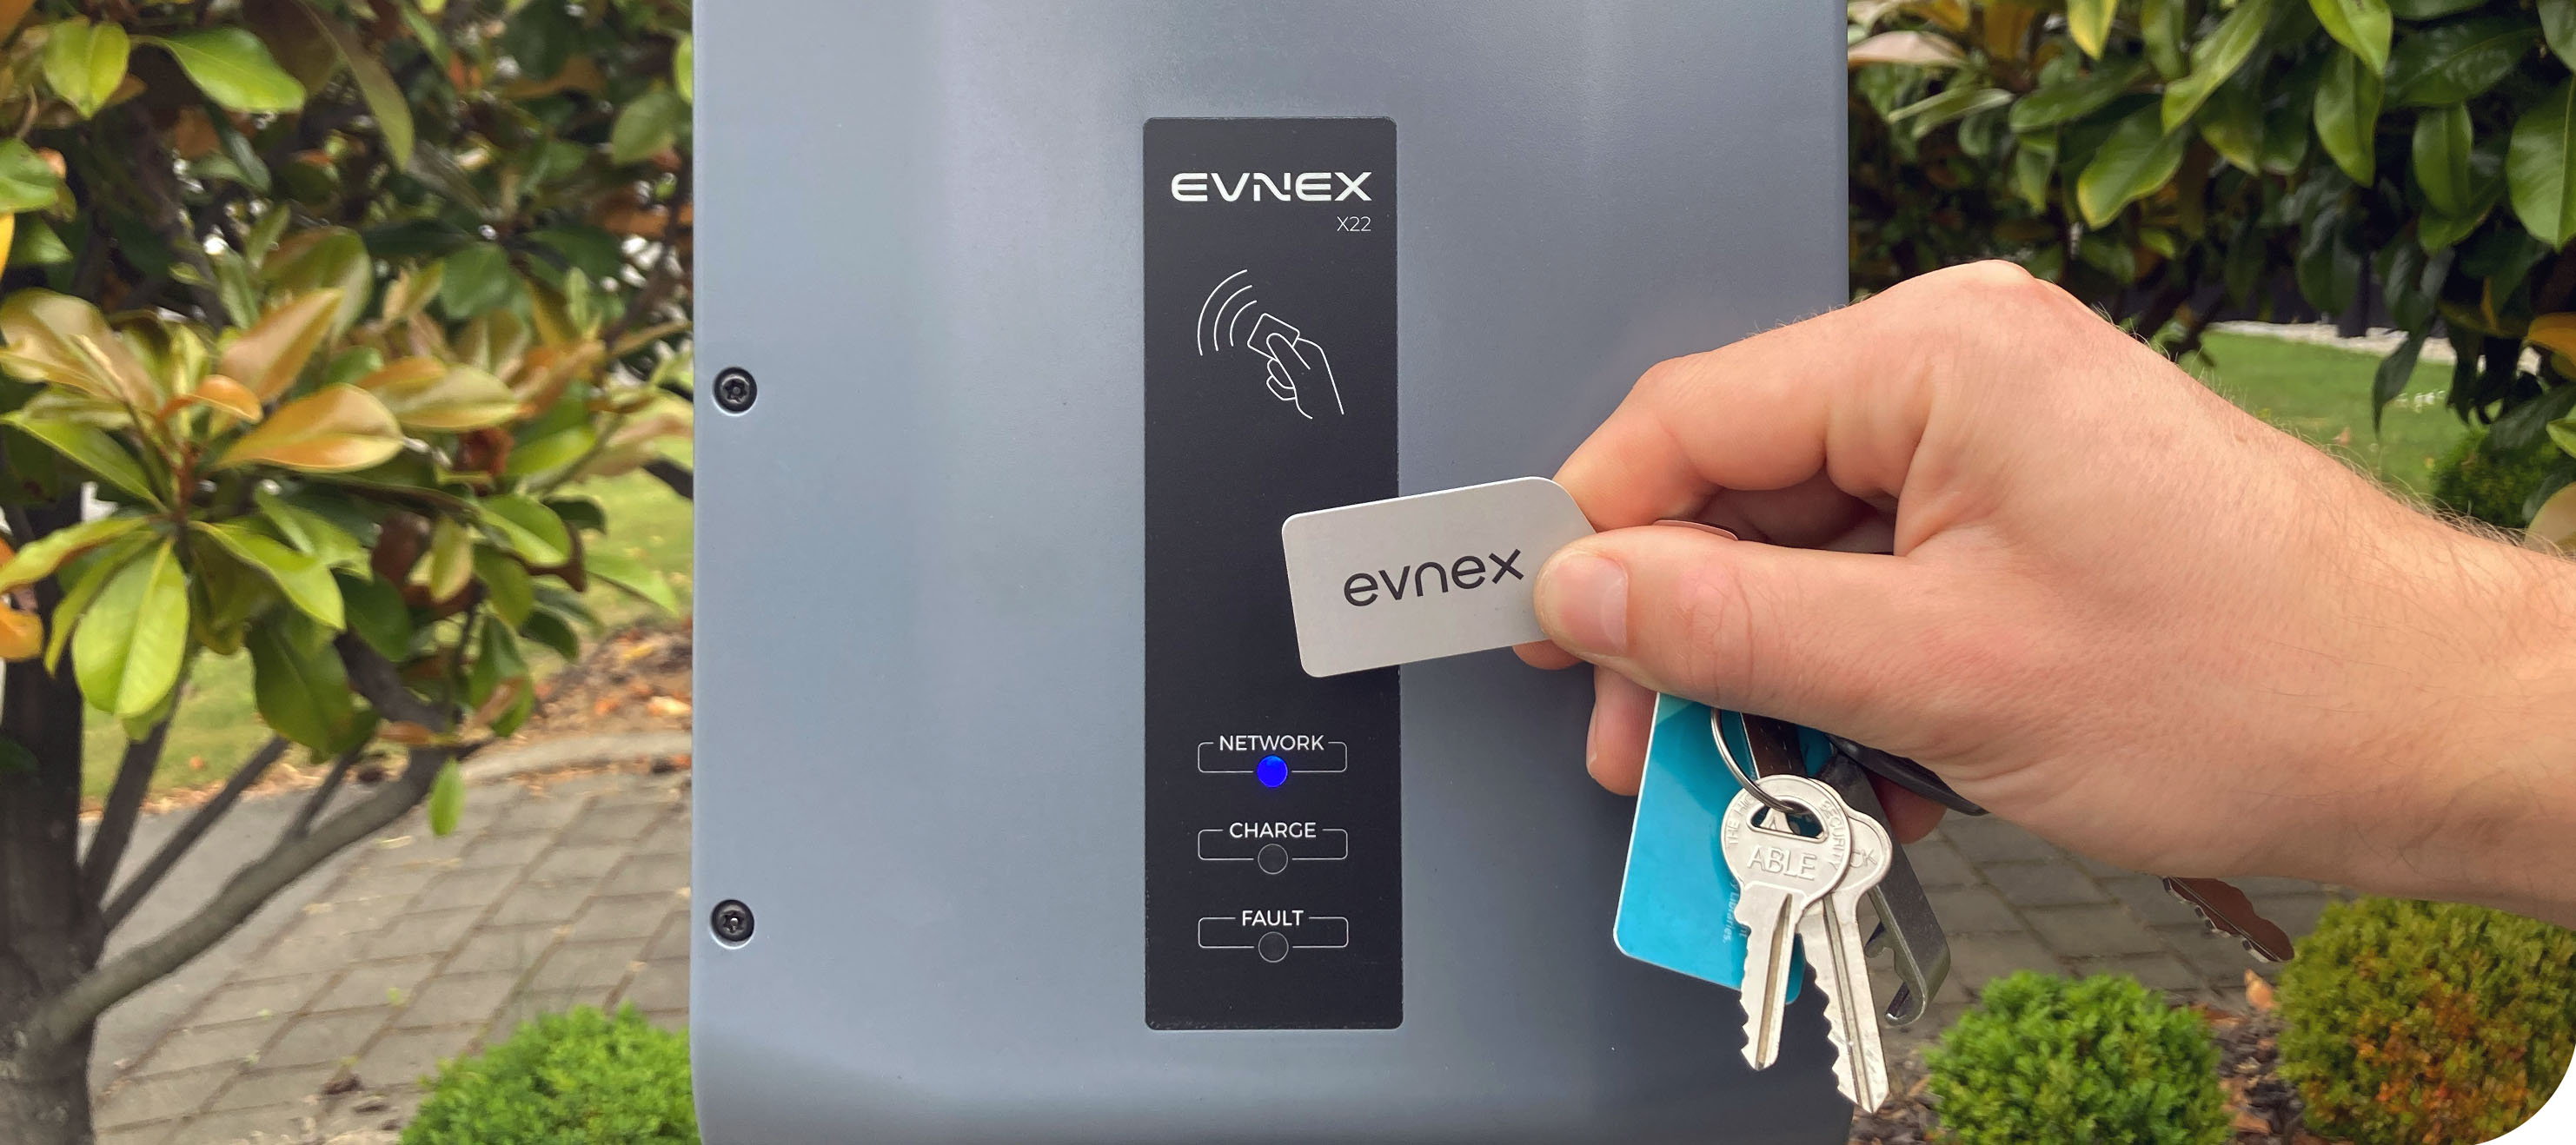
Scan your RFID Tag. Once you scan your tag the charger will indicate if it has recognised your ID.
-
Start Charging. After scanning your RFID successfully the charge session will begin momentarily and the green "Charge" LED indicator will change to solid green.

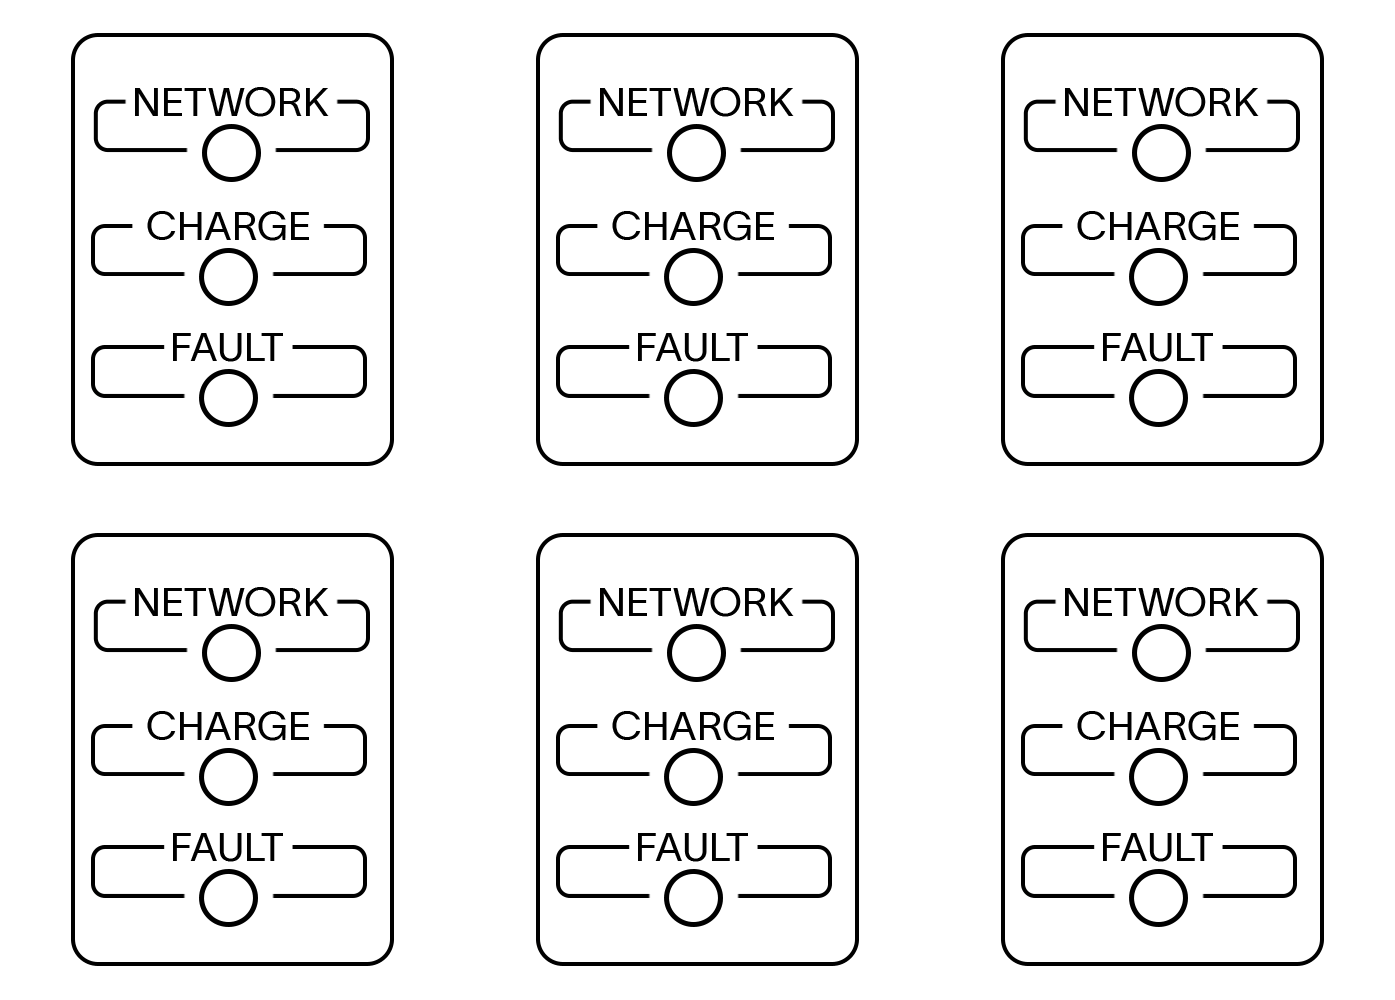
Successful RFID Reading: If successful, all three LEDs (Blue, Green, and Red) will flash once together in unison. Your charging session will begin momentarily with the green "Charge" LED showing a continuous glow.

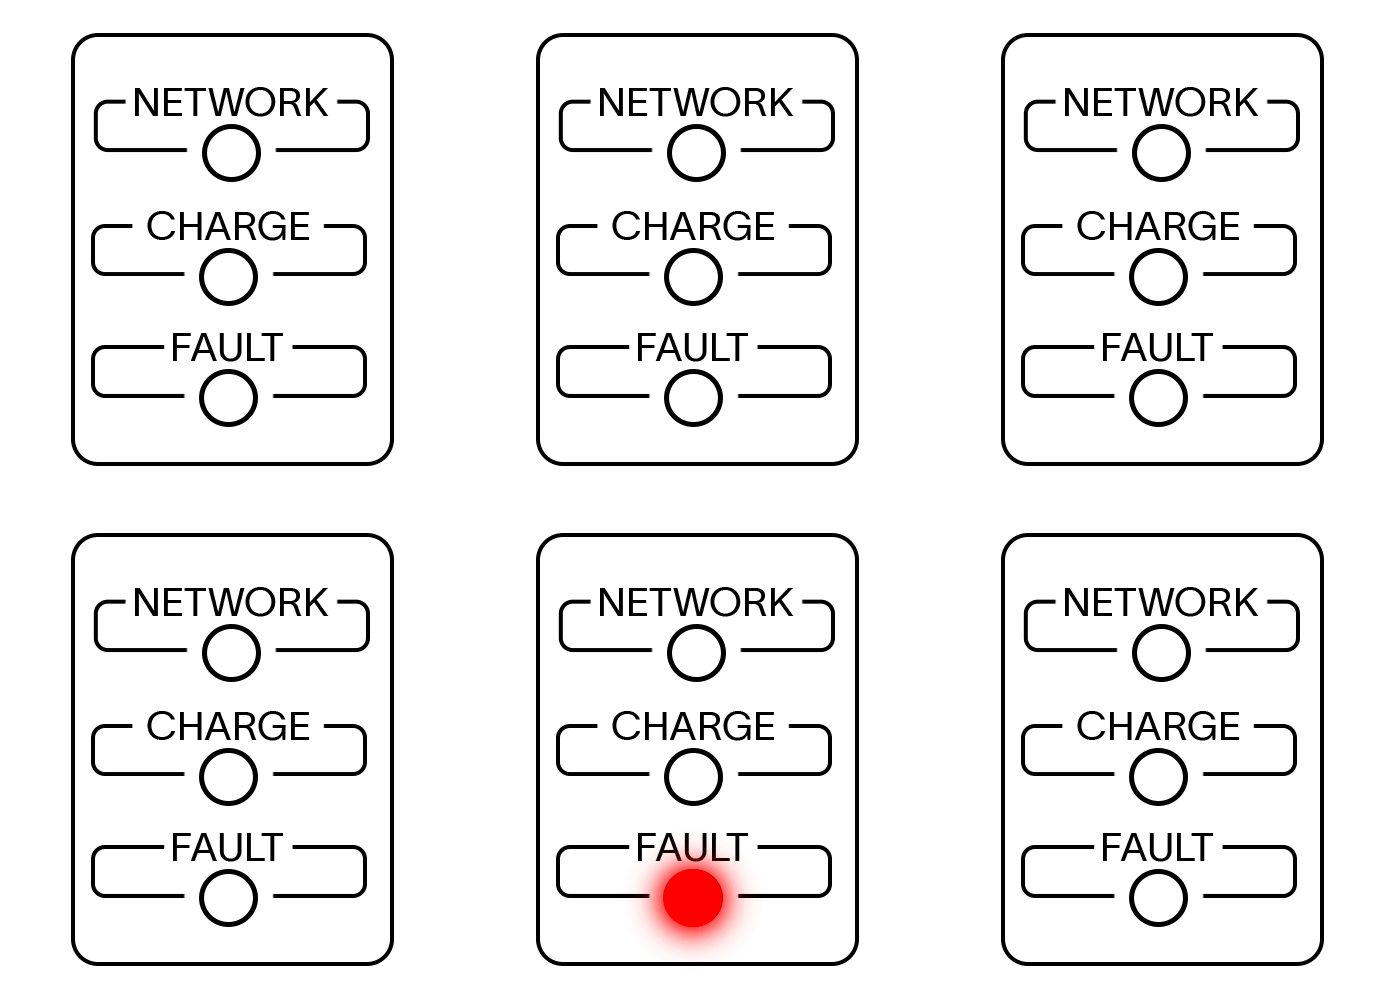
Failed RFID Reading: If the RFID is not recognised, all three LEDs (Blue, Green, and Red) will flash once together in unison followed by a blinking red "Fault" LED. If this occurs after multiple attempts, contact your employer or charge point owner to ensure you have EV charging privileges.
Updated 3 months ago
Congratulations! You're ready to start charging. If you want to learn more about the advanced tools and features available with an Evnex EV charger click below.